Domain template is a predefined set of domain-specific restrictions, options, and hosting parameters, intended to simplify creation of domains with automatic assignment of settings to them.
Use the domain template to assign the following parameters:
- Mail bounce configuration
- Maximum number of subdomains
- Disk space limit
- Maximum amount of traffic allowed
- Maximum number of web users
- Maximum number of databases
- Maximum number of mailboxes
- Mailbox quota
- Maximum number of mail redirects
- Maximum number of mail groups
- Maximum number of mail autoresponders
- Maximum number of mailing lists
- Maximum number of web applications
- Domain validity period
- Log rotation settings
- Scripting capabilities
- Webmail accessibility
- Mailing lists availability
- Traffic statistics retention period
- Domain DNS zone type
- Virtual host type
- Hard disk quota
- SSL support
- Microsoft FrontPage support,
- Microsoft FrontPage over SSL support,
- Microsoft FrontPage authoring
- Apache ASP support
- SSI support
- PHP support
- CGI support
- mod_perl support
- mod_python support
- ColdFusion support
- Web statistics
- Use of Custom Error Documents
To add a new domain template, follow these steps:
On the Home page click the
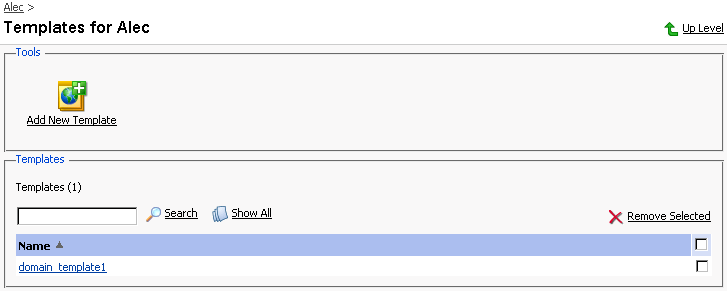
 Domain Templates icon. The Domain templates management page appears:
Click
 Add New Template. The Template creation and editing page appears.
Enter the name for the domain template in the Template name field.
Specify how to deal with the mail directed at nonexistent users in this domain, and enable access to Webmail, if desired.
Use the Limits group to define the resource usage limits for domains. To set the necessary parameters, deselect the Unlimited checkboxes, and type the limit values into the input fields.
To define the domain validity period, deselect the Unlimited checkbox, type the value into Validity period input field, and specify the time measurement unit (years, months, or days).
Select the Enable log rotation checkbox to enable it. Select the log rotation condition: to be based on log file size, or time (select from Daily, Weekly, Monthly). Specify the maximum number of log files, enable log files compression, and specify an e-mail address for the processed log files to be delivered to.
NOTE
It is advisable to set the logrotation options appropriately in order to prevent the log files from growing too large to be handled by the statistics utility.
To enable Mailing lists, select the corresponding checkbox.
To retain the traffic statistics for domains, select the corresponding checkbox and specify the retention period in the Retain traffic statistics for ... Months field.
Select the domain DNS zone type using the Master or Slave radio button.
To enable physical hosting for domain, select the Physical hosting checkbox.
Specify the hard disk quota in the appropriate field, if needed.
SSL support checkbox enables the maintenance of https protocol.
To allow the use of Microsoft FrontPage Server Extensions, check the checkbox for Microsoft FrontPage support and Microsoft FrontPage over SSL support. Authorization will be disabled by default. For security reasons, authorization should only be enabled when Microsoft FrontPage extensions are in use.
Use the remaining checkboxes to enable the following hosting features:
- Allow the web users scripting: enable support for scripting in web users' pages.
- ASP support: ASP module enabled.
- SSI support: Server Side Includes scripting enabled.
- PHP support: supports html documents that contain PHP scripts.
- CGI support: an individual cgi-bin directory is created and CGI scripting is enabled.
- mod_perl support: Perl scripting enabled.
- mod_python support: Python scripting enabled.
- ColdFusion support: ColdFusion scripting enabled.
- Web statistics: keeping access statistics for the domain. You can choose to password protect access to statistics.
- Custom Error Documents: allow the use of custom pages in case of web server errors.
Click OK to apply the changes made.
The template will be added to the list of domain templates and become available as option during creation of a new domain.
To edit a domain template:
On the Domain templates management page, select the template you wish to edit by clicking on its name in the list. The Domain Template Editing page will open, allowing you to change the desired options. Settings that can be configured on that page are absolutely the same as on the Domain Template Creation page.
Click OK after you are done with configuring the template.
NOTE
When altering a template, nothing will change for the domains that were previously created using this template.