Configure your Email Account in Outlook Express / Windows Live Mail
The configuration information that you have received for your email account will look like the example below. In this example we are going to use a fictitious person named Susan Jones. Susan's domain is "yourdomain.com" and the email address she is going to set up is susan@yourdomain.com. When you are setting up your own email account, you will obviously substitute "yourdomain.com" with your actual domain, and "susan@yourdomain.com" with your actual email address.Here is the configuration information Susan received:
Email address: susan@yourdomain.comPlease note that the user ID is your full email address, not just the part to the left of the @ sign. In this case the user ID is "susan@yourdomain.com", not just "susan".
User ID: susan@yourdomain.com
Password: password
Incoming (POP) mail server: mail.yourdomain.com
Outgoing (SMTP) mail server: mail.niner.net
Note
These instructions are based on Outlook Express version 6. If your version of Outlook Express is not 6 (or you are using Windows Live Mail), what you see and the arrangement of items on your screen may differ slightly, but the basic concepts and instructions are still the same.Step 1
First open Outlook Express / Windows Live Mail in the usual way. Once Outlook Express / Windows Live Mail is open, click "Tools" in the menu at the top of the window, and then "Accounts..." in the drop-down menu.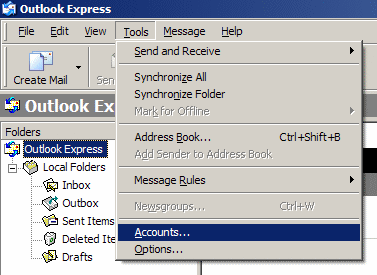
Step 2
In the window that pops up, click the "Mail" tab.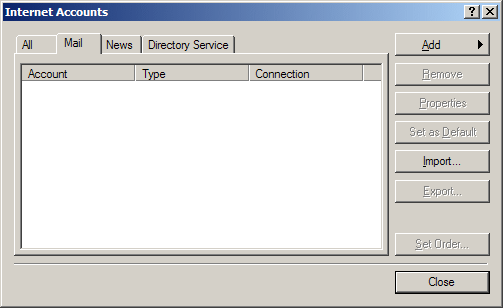
Step 3
Click the "Add" button and then click "Mail..." on the pop-out menu.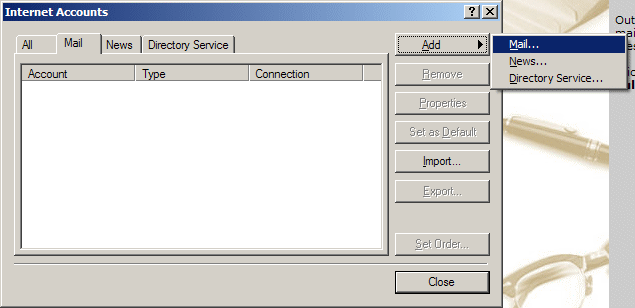
Step 4
In this and the following steps we will use the information for the fictitious person Susan Jones.In the window that appears, enter your name. Keep this short and simple with minimal punctuation. Just your name is all that you should enter here. Avoid also entering your company name, department, etc.
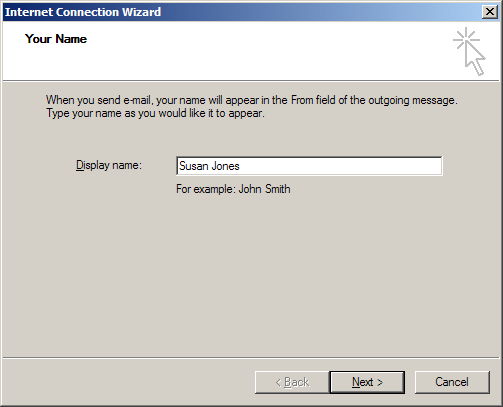
Click the "Next" button.
Step 5
Enter your email address.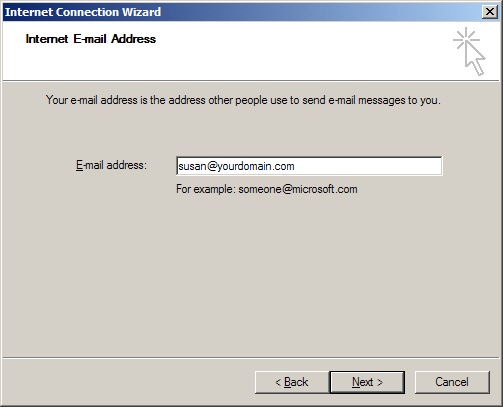
Click the "Next" button.
Step 6
Enter the following information: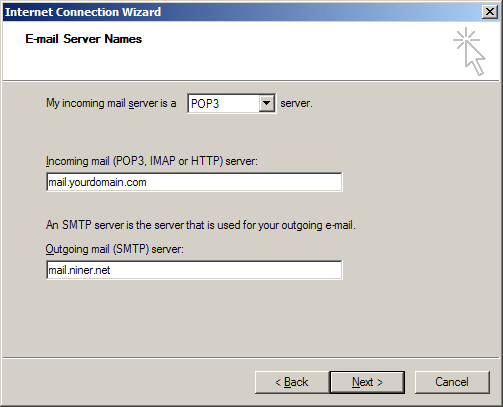
- Select "POP3" from the drop-down list where it says, "My incoming mail server is a POP3 server".
- Incoming mail (POP3, IMAP or HTTP) server: mail.yourdomain.com
- Outgoing mail (SMTP) server: mail.niner.net
You can use "mail.yourdomain.com" for the outgoing (SMTP) mail server if you prefer, but this will likely result in the "Internet Security Warning" shown at the bottom of this page.
Step 7
Enter the following information: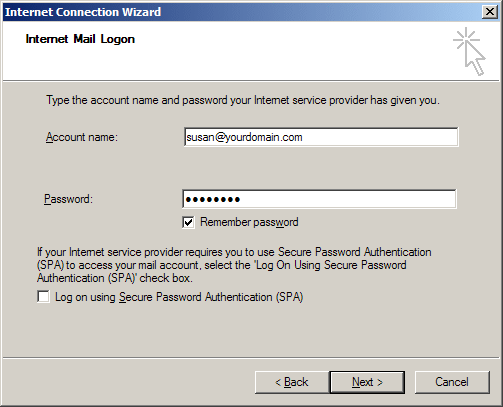
In Susan Jones' case, she would enter the following:
- Account name: susan@yourdomain.com
Again, please note that this is your full email address, not just the part to the left of the @ sign. Also note that there is no single standard for naming this item. While NinerNet uses the term "user ID", some programs will refer to it as "user name", "username", "log-in name", "account name", etc. - Password: password
Obviously you will enter your own password in this field -- the one that you were sent, or the one that you used when creating this email account in the control panel. Passwords are case-sensitive, which means that the passwords "password", "PASSWORD" and "pAsSwOrD" are three different passwords, not the same password. Also keep in mind that some letters and numbers look very similar in some fonts, particularly the lower-case "el", the upper-case "eye", the upper-case "oh" and the number zero or nought. - Remember password: If you wish your email program to remember your password so that you don't have to enter it each time you check for email, make sure your put a check mark or tick in this box.
- Log on using Secure Password Authentication (SPA): Make sure that there is no check mark or tick in this box.
Step 8
You will then see the window below indicating that you have finished setting up your email account on your computer. (You are not quite finished though, as there are a few more steps.) Click the "Finish" button to close this window.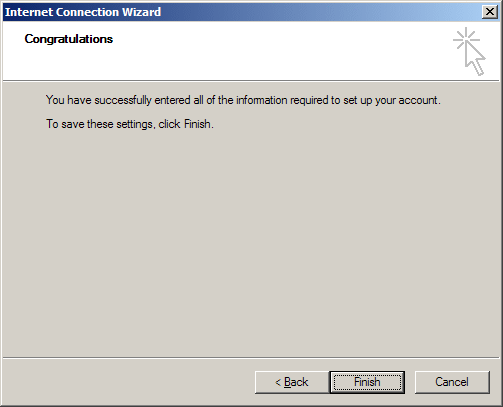
Step 9
You will now be back to the window you saw in step 2, but it will now list the email account that you just created. Left-click the new account and then click the "Properties" button.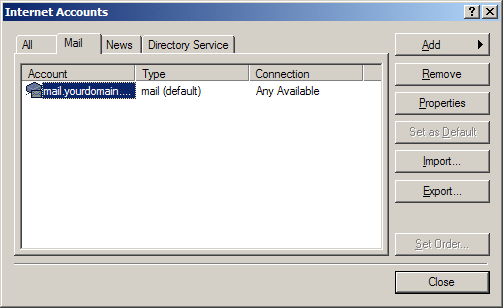
Step 10
In the window that pops up, on the "General" tab, give this account a name that makes sense to you. We suggest just using your email address. Other fields are optional.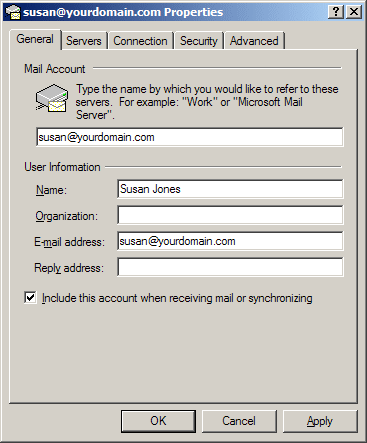
Then click the "Advanced" tab.
Step 11
On the "Advanced" tab, first make sure that there is a check mark or tick in the "This server requires a secure connection (SSL)" box, and then change the port number in the "Outgoing mail (SMTP)" field to 465. If you do those two steps in the reverse order, when you click to put a check mark or tick in the SSL box, Outlook Express / Windows Live Mail may change the port number back to 25 after you've already entered 465.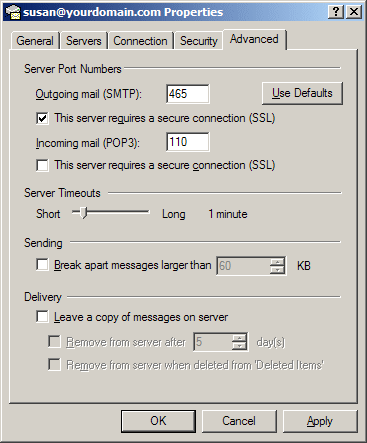
Now click the "OK" button.
Step 12
Now you are back at the window you first saw in step 2. Click the "Close" button and carry on using Outlook Express / Windows Live Mail.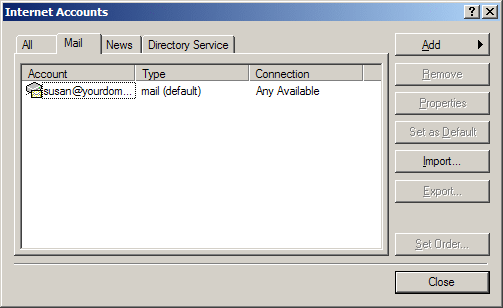
Note
If you use your own domain for the outgoing (SMTP) mail server, you may receive a warning from Outlook Express / Windows Live Mail that looks like the one below:
If you see this, please make sure that you click the "Yes" button -- or switch to using "mail.niner.net" for the outgoing mail (SMTP) server. If you click the "No" button, you will not be able to send email.
Home